AI Product Photography for eCommerce Ads: The Complete Guide

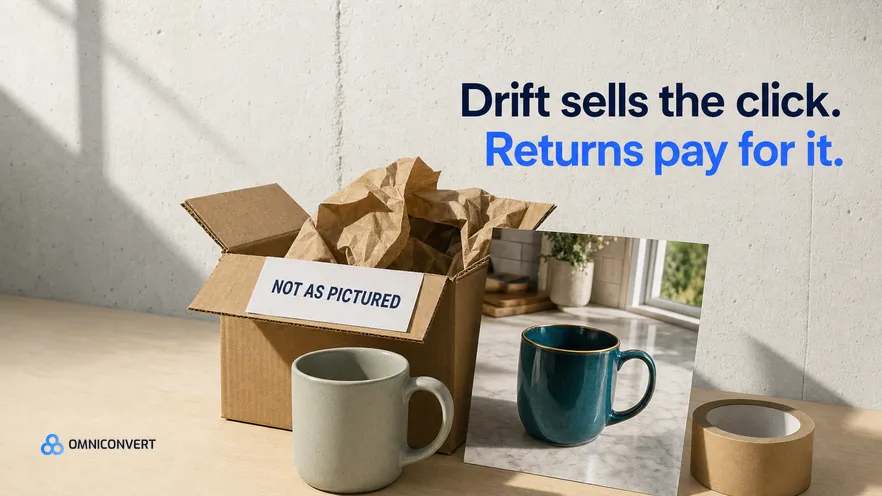
- AI product photography is four different techniques, and each one puts a different share of the real product at risk.
- The safest ad use keeps the real product pixels and generates only the scene around them.
- Colour, texture, scale and label text are where generated images drift, and drift shows up later as returns.
- Anything a customer judges by look, fit or label needs a real photo or a check against a physical sample.
- Judge an AI product image after the return window closes, by customer value, not by click-through rate.
AI product photography has turned a new lifestyle scene for a product into a few minutes of work. That moved the hard part. Making the image is easy now. Making sure it still shows the product the customer will receive is not, and neither is proving that the image earns more in sales than it costs in returns. Last updated: September 2026.
I have spent 13 years in eCommerce, and every new creative tool follows the same pattern: output rises first, and judgment catches up later. This guide is the judgment part. It covers the four kinds of AI product images, where each one works in ads and where it breaks, a decision framework for real, AI-edited and fully generated images, a production workflow with fidelity checks, and a way to test results by angle and by customer value.
First, where we stand, so you can read the rest with that in mind. Nexus by Omniconvert is the AI eCommerce growth engine for Shopify brands: it reads your store, ad and customer data, ranks growth opportunities by profit impact, and builds the campaigns to act on them, and you approve what goes live. Nexus composes ad creative with your existing product imagery. It does not shoot product photography, and it does not render virtual models. This guide is about the images you feed into any ad workflow, ours or anyone else's.
What is AI product photography?
I find it more useful to treat these four as a ladder than as a menu. Each step up gives you more creative freedom and puts more of the product at risk. I call the thing at risk product fidelity: how exactly the image shows the product the customer will receive, including its colour, texture, scale, shape, components and label text.
- Generated backgrounds and lifestyle scenes. The product is cut out of a real photo, and a model generates the setting around it: a marble counter, a camping table, a holiday dinner. When the tool keeps the product pixels untouched, the fidelity risk is low. The risk comes back when the tool regenerates the whole frame and redraws the product along with the scene.
- Relighting and retouching. The model changes light direction, shadows and reflections so the product sits believably in its new scene, or it removes dust, creases and glare. This step touches the product pixels. Light changes how colour and texture look, so a relit product can drift from the real one even when its shape is perfect.
- Virtual models. A garment, bag or piece of jewellery photographed on its own is placed on a generated person. To do that, the model redraws the item on a body: its drape, its fit, where the seams fall. That makes a virtual model closer to a generated product than to an edited photo, and I check it that way.
- Fully synthetic renders. The whole image, product included, is generated from reference photos or a text description. Nothing in the frame was captured. This gives the most freedom and the least fidelity. It is useful for concepts, and it is a liability in any image that claims to show the thing you ship.
Where AI product images work in ads
- Seasonal and occasion variants. The same packshot on a summer patio, a winter windowsill and a gift table. You get variety for a campaign calendar without a reshoot, and the product is the same photo in all of them.
- Scenes that carry an angle. An angle is the reason to buy that an ad argues. A water bottle sold on durability belongs on a rock by a trail. The same bottle sold as a desk habit belongs next to a laptop. A generated scene makes the angle visible before anyone reads the copy.
- Format adaptation. A square studio shot becomes a vertical story or reel frame when a model generates more background above and below it. The product is not touched, so this is one of the lowest-risk jobs AI does well.
- Angle tests before a shoot. You can test five angles with AI-edited scenes, find the two that bring in the best customers, and then pay for a real shoot of those two. The AI images do the exploring, and real photography does the scaling.
Product type matters as much as the job. A phone charger or a kitchen tool is bought for what it does, and a small shift in its grey does not change the purchase. Paint, foundation shades, fabric and furniture finishes are bought for how they look, so the same shift is a broken promise. The first group tolerates AI scenes well. The second needs every image checked against a physical sample.
The same logic continues after the click. A hero image is the lead visual at the top of a landing page, and that glossary entry covers how to design and test one. For ad imagery, the point is continuity: when the ad and the page show the product differently, the customer believes the page and stops trusting the ad.
Where it breaks: fidelity, trust and returns
- Colour. Generation and relighting both shift hue and saturation. A sage green sweater turns mint under warm generated light, and the customer who wanted sage sends it back. Colour drift is easy to miss, because the drifted image looks plausible on its own.
- Texture and material. Models smooth things. Brushed metal turns glossy, linen loses its slub, suede starts to look like felt. Texture is often the reason someone pays more for a product, so a smoothed texture removes the value from the image.
- Scale. A generated scene has no ruler. A candle stands next to an undersized mug and looks bigger than it is. A backpack looks roomier on a small generated body. Wrong scale leads straight to returns marked smaller than expected.
- Label and packaging text. Image models remain unreliable with small text. They misspell ingredient lists, invent characters and redraw logos slightly wrong. For supplements, cosmetics and food, the label carries regulated information, so a redrawn label is not a style problem.
- Components and count. A generated scene adds a matching saucer to a cup sold alone, or shows four pieces in a set of three. Anything in the frame reads as included.
- Fit and drape on virtual models. The garment is redrawn on a body the model invented, so the fit you see is the model's guess. That guess can hide a boxy cut or flatter a fabric that creases.
- Physics. Reflections of a room that is not there, shadows that fall two ways, a hand that grips the product the way no hand can. Customers may not name the problem, but they feel it.
The commercial cost arrives in two places. The first is returns: an image that oversells colour, size or finish converts people the product cannot satisfy, and a return costs you shipping, handling and sometimes the customer. The second is trust with repeat customers. They already own the product. When your ad shows a version of it they do not recognise, you spend their goodwill to buy a stranger's click.
Then there are the rules. In most markets, an ad that misleads about a product's main characteristics is a consumer protection problem, not only a policy one. Ad platforms prohibit misleading product claims, and several now label AI-generated content or ask for disclosure in some situations. Marketplaces often hold the main product image to stricter rules than ads, such as a plain background and a photograph of the actual item. These rules change often, so check the current policy wherever the image will run.
Real, AI-edited or fully generated: how to decide
| Dimension | Real photography | AI-edited scene | Fully generated |
|---|---|---|---|
| What stays real | The whole image | The product pixels from a real photo | Nothing in the frame |
| Fidelity risk | Lowest | Low, and higher with every relight | High on colour, texture, scale and text |
| Best ad job | Detail, texture, fit and proof shots | Context, seasonal variants and new formats | Concept and mood tests before a shoot |
| Poor fit for | Fast seasonal variety on a tight budget | Products judged by fit on a body | Any image that claims to show the item |
| QA effort per image | A normal retouch review | Edges, light and a colour check | A full check against a physical sample |
| Marketplace main image | Usually the safe choice | Check the marketplace rules first | Avoid |
When the table does not settle it, four questions usually do. Ask them in order. The first one that applies decides the route.
- Does the customer judge a visual property of the product? Colour, shade, texture, finish, pattern. If yes, use a real photo, or an AI-edited scene whose product layer you check against a physical sample.
- Is fit or drape part of the decision? If yes, shoot it on a real person. A virtual model is fine for a mood board, not for the ad that sells the size.
- Does the label carry information the customer relies on? Ingredients, dosage, allergens, care instructions. If yes, the label must come from a photo, never from a model.
- Is there no good real photo of the product yet? Then you are choosing between a shoot and a concept image. Use generated concepts to decide what to shoot, not to replace the shoot.
Most teams end up with a mix: real photography as the base layer, AI-edited scenes on top for ad volume, and fully generated images kept internal as sketches. If you already have a solid photo library, making ad creative from your real product photos is the route with the least fidelity risk.
A production workflow for AI product images
- Build a reference set. For each product, keep real photos of the front, back and sides, one close detail of the material, one next to an object of known size, and one under neutral, daylight-balanced light for colour. Keep a physical sample within reach of the person who does QA.
- Choose the route per image. Use the decision framework above. Write the route into the file name or the brief, so reviewers know which checks apply.
- Lock the product layer. Cut the product out of the reference photo and protect it with a mask. Generate the scene around the product, not through it. If a tool can only regenerate the whole frame, treat its output as fully generated.
- Match the light to the product. Where you can, pick or prompt a scene whose light direction already matches the reference photo, instead of relighting the product to fit the scene. Every relight is a new colour risk.
- Run the fidelity check. Compare the output with the reference set and the physical sample, using the checklist in the next section. Reject rather than repair anything that fails on colour, text or components.
- Review what the scene implies. Props read as included, settings read as use cases, and people read as fit. If the scene suggests a lamp is waterproof because it stands by a pool, change the scene or confirm the claim.
- Log the source. Record the reference photo, the tool, the edits and the person who approved the image. Keep any content credentials or metadata the tool attaches. When a customer complains or a platform asks, you can show exactly what was real.
For the hands-on detail of each stage, read how to generate product ad images with AI, step by step. This guide stays on the decisions and checks around it.
The fidelity QA checklist
- Colour. Put the image on a calibrated screen next to the reference photo, with the physical sample under the same neutral light. Sample a few points with a colour picker and compare the values with the reference. Do not judge colour on a phone at night.
- Texture. View the image at 100% zoom. Weave, grain, brushing, the pores in leather and the matte or gloss of a finish must match the detail shot.
- Scale. Find something of known size in the scene: a hand, a mug, a book, a door handle. Ask whether the product would look that size next to it in real life.
- Shape and proportion. Check handles, straps, lids, feet and edges against the side and back photos. Models round corners and shorten straps.
- Label and text. Read every visible character and compare it with the real packaging. Any difference fails the image.
- Components. Count what is in the frame and compare it with what is in the box. Remove or replace props that could read as included.
- Physics. Check that shadows fall one way, reflections show the scene, liquids behave and hands grip naturally.
- Consistency across variants. Put all variants for one product side by side. If the product looks slightly different in each, the set fails, even when every image passes on its own.
One last test catches what the list misses. Show the image to someone who handles the product every day, and ask: is this exactly what arrives? If they hesitate, the customer will too.
How to test whether AI imagery performs
Click-through rate is the metric AI imagery is most likely to win and the one that tells you least. A glossy scene stops the scroll. Whether it sold the right product to the right person shows up later: on the product page, in the returns queue, and in whether the customer buys again.
So design the test around three rules.
- Hold the angle constant. Compare a real photo and an AI-edited scene inside the same angle, with the same copy, audience and placement. If you compare a gifting ad with a generated scene against a durability ad with a real photo, you have tested two things and learned neither. A small grid works: two or three angles, each with a real-photo version and an AI-image version.
- Follow the customer past the click. Tie each order to the ad that acquired it with ad IDs or UTM parameters. Then read the whole chain: click-through rate, product page conversion rate, first-order value, discount use, return rate with reasons, and repeat purchase over a window that fits your buying cycle.
- Split by customer value. Break the results down by new and returning customers and by value segment. An AI scene can pull more first orders from discount-driven buyers who never come back, while the real photo pulls fewer, better customers. The CLV-weighted growth model sets out how to weigh those two outcomes against each other.
Two practical warnings. Returns lag orders, so a result you read in the first week is a click result, not a profit result. And image tests need the same statistical discipline as on-site tests: a sample size set before launch and a decision rule written down, as the guide on when to call an A/B test winner explains. Across 70,000+ experiments on Omniconvert Explore, the average conversion uplift is 23.2%. I mention that number for one reason: ad image tests deserve the same rigour, and that rigour starts with one variable per test.
Expect the answer to differ by angle. In my experience, AI scenes tend to help angles that sell a mood or an occasion, and real photos tend to hold up better on angles that sell proof: materials, ingredients, fit. Treat that as a hypothesis to test in your own account, not as a rule.
Where Nexus fits, and where it does not
Here is the boundary in plain words. Nexus unifies your store, ad and customer data, builds RFM segments and ranks angles by CLV. It generates launch-ready assets from customer data: static ads, video ads, landing pages and email copy. When those assets show a product, the product comes from imagery you supply.
It also monitors competitor ad libraries continuously and classifies competitor creative by angle, hook and offer. If every competitor already runs the same generated kitchen scene, a real photo with a sharper angle may stand out more than one more scene. Results are measured in True Profit, not ROAS.
It does not shoot product photography, render virtual models or replace a photographer. Whatever image tool you use, run the fidelity checks above before its output reaches an ad. If you are still choosing tools, the comparison of AI ad creative generators sets standalone tools against integrated ones. Nexus is now onboarding founding brands.
FAQ: AI product photography for ads
Can I use AI-generated product images in my ads?
Yes, as long as the image shows the product accurately. The safest use keeps a real photo of the product and generates only the scene around it. Fully generated product images carry the most risk, because colour, texture, scale and label text drift. Ad platforms and marketplaces set their own rules and change them often, so check the current policy wherever the image will run.
Do AI product images increase returns?
They can, when the image stops matching the product. A drifted colour, a smoothed texture or a false sense of size converts people whose expectations the product cannot meet. The fix is not to avoid AI imagery. It is to check every image against a physical sample and to track return rate and return reasons by the ad that acquired each order.
Should I use virtual models instead of a photoshoot for apparel?
Not for the ads that sell fit. A virtual model redraws the garment on an invented body, so the drape and fit in the image are a guess. Virtual models are useful for mood boards and early angle tests. For the ads that carry size and fit decisions, photograph the garment on a real person.
How do I check an AI product image for accuracy?
Compare it with the real product, not with other AI images. Check colour next to a physical sample under neutral light, texture at full zoom, scale against an object of known size, label text character by character, and components by count. Put all variants of one product side by side, because a set can fail even when each image passes alone.
How do I know if AI product images perform better than real photos?
Test them inside the same angle, with the same copy, audience and placement, so the image route is the only difference. Then follow each order past the click: product page conversion, first-order value, return rate and repeat purchase, split by customer value. Wait until the return window closes before you call a winner.
Does Nexus by Omniconvert do AI product photography?
No. Nexus composes ad creative with the product imagery you already have. It generates launch-ready assets from customer data, including static ads, video ads, landing pages and email copy, and it ranks angles by CLV. It does not shoot product photography or render virtual models, and you approve what goes live.
The bottom line
AI product photography is a real gain for eCommerce ads when you use it for what it does well: putting a real product into more settings, formats and angles than a shoot budget allows. It becomes a cost when it quietly redraws the product, because the customer compares the ad with the parcel, not with your intentions. So keep real photography as the base layer, generate scenes around real product pixels, check every image against a physical sample, and log what was real. Then judge the images inside one angle, past the click, after the return window, and by the value of the customers they bring. An image that wins the click and loses the customer did not win.