How to Make Ad Creative From Your Real Product Photos

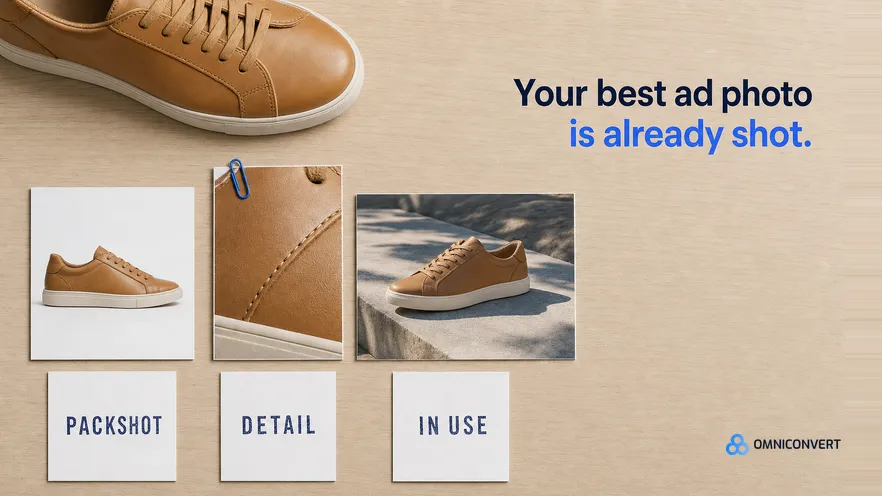
- Real product photos are the safer base for ads because the customer receives exactly what the ad showed.
- Each shot type in a photo library proves a different thing, so tag the library by shot type before you build any ad.
- Pick the angle from customer data first, then choose the photo that proves it, never the other way round.
- Change one layer per variant (photo, headline, proof, offer or format) so every result tells you what worked.
- Refresh a tiring ad with a different shot from the same library before you book a new photo shoot.
Real product photos are the fastest route to more ad creative, and most brands already have them. The packshots, detail shots and in-use images you took for the product page can carry dozens of ad variations once you tag them, pick the right angle and change one layer at a time. They also bring something a generated model cannot: the customer sees exactly what arrives. Last updated: September 2026.
I have spent 13 years in eCommerce, and one scene repeats across Shopify and DTC brands of every size. The ad team asks for a new shoot or a new AI tool, while a folder of accurate, approved product photos sits unused. The photos were never the constraint. The missing piece was a method for turning them into ads.
That method is what this guide covers. It is also how creative works in Nexus by Omniconvert, the AI eCommerce growth engine for Shopify brands: it reads your store, ad and customer data, ranks growth opportunities by profit impact, and builds the campaigns to act on them, and you approve what goes live. For ads, Nexus composes creative with your existing product imagery. It does not run a photo shoot or render a model.
If you are weighing generated imagery against real photos in general, start with the complete guide to AI product photography for eCommerce ads. If you have already chosen to generate new scenes, how to generate product ad images with AI covers that route. This guide is for brands that want to start from what they already own.
How to make ad creative from real product photos
The seven steps below expand each part. The idea underneath it is simple: the photo is the evidence and the layout is the argument. Most teams either treat the photo as decoration and put all their effort into copy, or replace the photo with a generated scene and lose the evidence altogether.
The numbers work in your favour. One product with a packshot, two detail shots, an in-hand shot and an in-use shot gives you five pieces of evidence. Put three headlines and two formats on top and you have thirty possible ads before anyone picks up a camera. The hard part is not producing more images. It is deciding which combinations are worth running.
Why real photos are the safer, stronger base
Trust comes first. Shoppers cannot touch a product online, so the image does the work of the hand. When the ad shows a softer fabric, a deeper colour or a garment on a generated body it was never fitted to, the customer notices. Sometimes on the product page. Sometimes at the doorstep.
Fidelity is the second reason. Image generators are good at plausible scenes and less reliable on exact detail. The stitch pattern, the clasp, the logo placement, the true shade of a dye: these are the details that drift when a tool redraws a product, and they are the details a careful buyer checks.
Returns are the third. Baymard Institute puts average online cart abandonment at about 70%, so most shoppers already walk away before checkout. An ad that oversells adds a more expensive kind of loss: it moves doubt to after the purchase, where it costs shipping, handling and sometimes a review saying the product looked different in the ad.
None of this makes generated imagery useless. A generated background, a seasonal setting or an extended canvas for a vertical format can work well when the product in the frame stays exactly as photographed. The rule I use is short: tools may change the world around the product, never the product.
What your photo library already holds
The table maps each shot type to the angle it serves best and the mistake that most often weakens it.
| Shot type | Ad angle it serves best | Common mistake |
|---|---|---|
| Packshot on a plain background | Offer, price and bundle ads, where the customer needs to see exactly what they get | Shrinking the product under a large offer badge until it is unreadable at feed size |
| Detail or macro shot | Quality and material angles: stitching, texture, ingredients, finish | Sharpening or colour grading until the texture no longer matches the real product |
| In-hand or scale shot | Objections about size, fit or portability | Leaving out a familiar reference, so the size question stays open |
| In-use or lifestyle shot | Outcome angles: what daily life looks like with the product | Framing so wide that the ad sells the setting, not the product |
| Flat lay or what is in the box | Value and gifting angles | Including props that do not ship with the order |
| Variant or colour lineup | Choice, new colour launches and personal taste | Showing variants that are out of stock, or colours that look different from the real item |
| Customer photo (with rights to use) | Social proof and real-world fit | Retouching it until it looks like a studio shot, which removes the reason it works |
Read the third column first. Every mistake in it has the same root: a layout or an edit that weakens the photo's job as evidence.
If you sell on Shopify, the product media on each product page is the obvious starting point. Those images are already approved, already accurate and often already assigned to variants. Add older shoots and customer photos, tag them in one sheet, and you have what I call a shot-to-angle map: an index that records which ad angle each photo can prove.
Pick the angle from customer data first
If hook, concept and angle blur together on your team, this breakdown of hook vs concept vs angle is worth ten minutes. Here the angle is what matters: the reason to buy that the ad argues for.
The common failure is photo-first thinking. Someone picks the most beautiful lifestyle shot, then writes a headline to fit it. The ad looks good and argues for nothing in particular.
Start from data instead. Reviews tell you which details people praise. Return reasons tell you which expectations the product failed to meet, so you know what not to overpromise. Post-purchase survey answers tell you the hesitation that almost stopped the order. And the first product your repeat buyers ordered tells you which promise brings in customers who stay.
That last signal is the one most teams skip, and it is the one that decides profit. An angle that wins clicks from one-time discount buyers can lose, in margin, to an angle that wins fewer clicks from customers who come back. This is how Nexus ranks angles: it generates launch-ready assets from customer data, weights each angle by customer lifetime value, and composes the creative with your existing product imagery. It also monitors competitor ad libraries and classifies competitor creative by angle, hook and offer, so you can see whether your angle is saturated or still an edge.
Seven steps from photo library to live ads
- Audit and tag the photo library. Collect every product photo you own, including product page images, older shoots and customer photos you have rights to use, and tag each one by product, variant, shot type, orientation and space for text.
- Pick the angle from customer data. Read reviews, post-purchase survey answers, return reasons and the first product your repeat buyers ordered, then choose the angle your most valuable customers respond to.
- Compose layouts around the real photo. Build each layout in layers on top of the unchanged product photo: a headline that states the angle, one proof element, an offer only where it fits, and a format sized for the placement.
- Create variations one layer at a time. Hold every layer fixed except one, and change only that layer in each variant, so each result shows which layer moved performance.
- Check every variant against the real product. Compare colour, texture, proportions, variant and box contents with the product you ship, confirm stock and claims, and reject any edit that changed the product instead of its surroundings.
- Test against one success metric. Launch a small, balanced set of variants per angle and judge them on the value of the customers they bring in, not on click-through alone.
- Refresh from the same library before fatigue. Watch frequency, click-through and cost per result, and swap in a different shot type for the same angle before performance drops.
In step three, the proof layer can be a star rating, a short review line or a small detail shot. The offer is optional: a quality angle often works better without a discount badge next to the product.
Step four is where the learning happens. Change the photo, headline and offer at once, and a win tells you only that something worked. Change one layer and the result names the layer that did the work. The same rule sits under on-site testing, where Omniconvert Explore records a 23.2% average conversion uplift across 70,000+ experiments: a test teaches you most when you can say exactly what changed.
The same layers carry over to motion, and how to create video ad variations at scale covers that side.
The fidelity check before anything goes live
- Colour. Compare the variant with the product page image on the same screen. Background removal, colour grading and compression all shift colour.
- Shape and detail. Zoom in on edges, logos, clasps and stitching. Tools that extend a background can also redraw the edges they touch.
- Contents. Everything visible in the ad ships in the box, or the ad says clearly that it does not.
- Stock. Every variant shown is available in the market where the ad runs.
- Claims. Every headline claim has a source you can point to: a review, a test result or a spec sheet.
- Rights. Customer photos and model shots carry usage rights that cover paid ads, not only organic posts.
Whatever builds the variants, a person should sign this list off. In Nexus that step is part of the flow by design: you approve what goes live.
Refresh from the same library before fatigue
Fatigue shows up gradually. Frequency climbs, click-through slides and cost per result rises. Days active is a useful signal here: an ad that has run for a long time and still earns its budget is telling you the angle is strong, even when the image is tired.
The mistake is to treat fatigue as a reason for a new shoot. Most of the time the angle is not tired. The picture is. So rotate in this order: first the shot type for the same angle, then the headline, then the format, and only then the angle itself.
Plan the rotation when you build the first batch. For each winning angle, hold back two or three shots from the library as reserves, so the refresh is ready before the numbers turn. Where the library genuinely runs out, say a product with only a packshot, a new shoot earns its cost, and your shot-to-angle map tells you exactly which shots to book.
If you are still choosing tooling for this loop, standalone AI ad creative generators vs integrated systems sets out the trade-off.
FAQ: ad creative from real product photos
Are real product photos better than AI-generated images for ads?
For showing the product itself, usually yes. A real photo shows the true colour, texture, size and fit, so the customer receives what the ad promised. Generated imagery can work for backgrounds, seasonal settings and format extensions, as long as the product in the frame stays unchanged. The risk grows when a tool redraws the product or places it on a generated model.
Can I edit real product photos without misleading customers?
Yes, if the edit changes the surroundings and not the product. Cropping, resizing, extending a background, removing clutter and adding text are fine. Changing colour, texture or proportions, or adding features the product does not have, is not. A simple test: would a customer holding the product say the ad shows it honestly?
What if my product photo library is small or outdated?
Map what you have first, then fill gaps on purpose. A useful minimum for a hero product is a packshot, a detail shot, an in-hand shot for scale and an in-use shot. Customer photos you have rights to use can fill the in-use gap quickly. Book a new shoot only for the shot types your winning angles need.
Do I need a new photo shoot to use Nexus by Omniconvert?
No. Nexus works with the product imagery you already own: it generates static and video ad creative from customer data, composes it with your existing product photos, and ranks angles by CLV-weighted value. It does not run photo shoots or render models, so the product in every ad is the product you ship. You approve what goes live.
How often should I refresh ads built from product photos?
Refresh when the signals turn, not on a fixed calendar. Rising frequency, falling click-through and rising cost per result together mean the image is tiring. Keep the angle if it still earns its budget and swap in a different shot type from the library first. Change the angle only when a fresh image on the same argument stops working.
The bottom line
You probably do not need more photos. You need a way to turn the ones you have into arguments. Tag the library by shot type, choose the angle from what your best customers already tell you, and build every ad around a photo that shows the product exactly as it arrives. Change one layer at a time so each test teaches you something, check fidelity before anything goes live, and refresh with a different shot before the numbers turn. Real product photos are the option where the ad, the product page and the parcel all agree, and that agreement is what turns a first order into a second one.