How to Generate Product Ad Images With AI

- Choose the angle before the image, because a beautiful image of the wrong promise still loses.
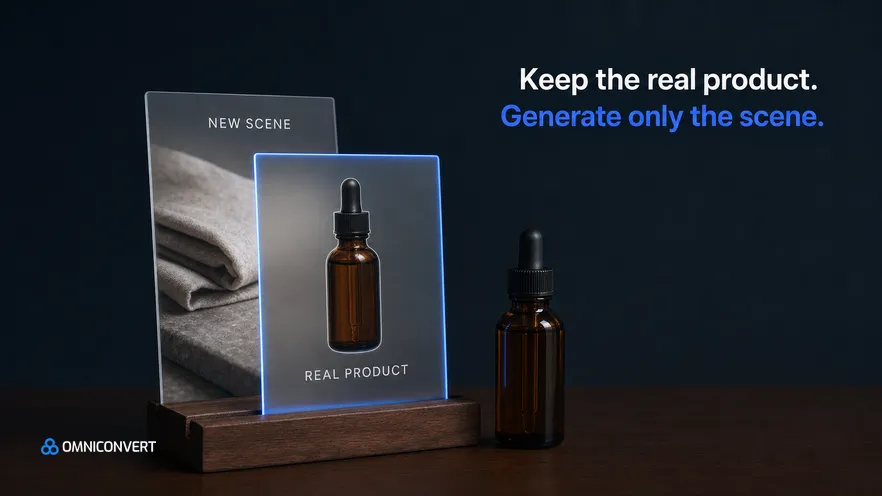
- Keep your real product pixels and generate the scene around them, because a redrawn product needs a far stricter check.
- Every generated image needs a fidelity QA pass for colour, scale, label text, finish and invented features before it goes live.
- Build each placement ratio as its own composition instead of cropping one master image.
- Judge a test by angle and by the value of the customers each angle brings in, not by the cost of a click.
Product ad images made with AI usually fail in the same place. The scene looks right and the product inside it is slightly wrong: the navy has drifted toward black, the bottle is twice its real size, the label reads like a near miss. The shopper who receives something different does not blame the model. They return the order. Last updated: September 2026.
This is the production workflow for static images on Meta and Google placements, step by step. It sits under our complete guide to AI product photography for eCommerce ads. If you would rather keep your product photos untouched and build the ad around them, read how to make ad creative from your real product photos. This page covers generating new scenes around a real product.
I have spent 13 years in eCommerce, and the rule behind this workflow is older than any image model: the image is the last decision, not the first. Nexus by Omniconvert is the AI eCommerce growth engine for Shopify brands: it reads your store, ad and customer data, ranks growth opportunities by profit impact, and builds the campaigns to act on them, and you approve what goes live. Every step below also works by hand.
How do you generate product ad images with AI?
The order matters more than the tool. Most teams start in the image generator and only then try to decide what the ad says. An image argues for one reason to buy, so the reason has to exist before the pixels do.
Then decide how the tool treats your product. Some tools keep your product pixels fixed and generate only the setting around them. Others redraw the whole image, product included, from a reference photo. The first approach protects fidelity by design. The second needs a much stricter check, because the product is now a drawing of your product. For ads, I default to the first.
The eight steps, in order
- Pick the angle before the image. Choose one reason to buy from reviews and your best customer segments, and write it as one sentence.
- Prepare clean product cut-outs. Remove the background from sharp photos of every variant you advertise, and add a colour reference shot.
- Write the scene brief. Describe the setting, props, light and camera that prove the angle, and list what must not change.
- Generate variations. Make a small batch of scenes per angle, changing one element at a time.
- Run a fidelity QA pass. Check each image against the physical product for colour, scale, label text, finish and invented features.
- Size for placements. Build each Meta and Google aspect ratio as its own composition, and add copy last.
- Launch as a structured test. Hold audience, budget, copy and landing page constant across angles, and set the stopping rule before launch.
- Read results by angle and customer value. Group images under their angle, and compare angles by the value of the customers they brought in.
Step 1: pick the angle from reviews and customer segments
If the terms blur, read the difference between a hook, a concept and an angle. Here, the angle decides the scene. "Survives the dishwasher" and "pretty enough to leave on the counter" can describe the same mug, and they need two different photographs. Look in four places:
- Five-star reviews. Find the specific thing people praise, in their words. "Fits in a carry-on" beats "high quality".
- Low reviews and return reasons. They show the doubt your image must answer: size, colour, durability.
- Customer segments. Split reviews and orders by customer value. A simple RFM split is enough. A reason only your best customers mention is a strong candidate.
- Competitor ads. Note which angles everyone already runs. A crowded angle needs a scene that looks different.
Write two or three angles as single sentences. Each one becomes its own brief and its own test cell.
Step 2: prepare product cut-outs the model cannot distort
Before you generate anything, build a small kit for each product:
- A cut-out per variant. One transparent-background file for every colourway and pack you advertise. Never let the model recolour one variant into another.
- Front and three-quarter views. The scene can then match the camera angle instead of forcing a flat front shot into perspective.
- A straight-on label shot. It becomes the reference for the text check in step five.
- A colour reference. The product in neutral daylight next to a physical colour card, or your approved swatch.
- The real dimensions. Written down, for the brief and again for QA.
Clean edges matter more than people expect. A rough mask leaves a pale halo that every scene inherits, and the halo is what makes an ad look pasted. If a photo is too soft to cut out cleanly, reshoot it. No model turns a blurry source into a faithful product.
Steps 3 and 4: write the scene brief, then generate in small batches
The scene brief is a narrow cousin of the full creative brief, written for one image instead of one campaign. Six lines are enough: the angle sentence; the customer, in plain words; the setting and props, with real sizes; the light and camera; what is fixed (product, colour, label, proportions); and what is not allowed (extra products, text in the scene, props that imply a claim you cannot support).
An example. Angle: leak-proof enough to throw in a gym bag. Scene: the bottle on its side in an open gym bag, next to a folded towel and a phone for scale, under hard overhead light. Not allowed: water droplets on the bag, because they contradict the claim.
Then generate. Change one element per set: the setting in one, the light in another, the camera angle in a third. If every image changes everything, a winner teaches you nothing. Do not ask the model for headlines or prices. Add copy in a layout step, where the spelling is yours.
Step 5: the fidelity QA pass for AI product images
Do this with the product on the desk, and zoom in. The checker should not be the person who generated the images, because that person already sees what they meant to make.
| Failure mode | What it looks like | The check that catches it |
|---|---|---|
| Colour drift | Navy reads as black under warm scene light | Compare a flat area of the product with the colour reference shot |
| Scale error | The serum bottle is as tall as the vase beside it | Check proportions against a known-size prop and the real dimensions |
| Garbled label text | Swapped letters, a drifting brand name, noisy small print | Read every word against the label shot; reject any redrawn label |
| Invented features | An extra zip, button, strap or port | Count visible parts against the spec sheet |
| Wrong finish or variant | Matte turns glossy, or an unstocked colourway appears | Compare surface and variant with the physical product |
| Pasted look | Pale edge halo, no contact shadow, light from two sides | Zoom in on edges and match shadow direction to the brief |
| Stray text and marks | Gibberish signage or fake logos in the background | Scan the full frame, not only the product |
| Unsupported claim | A scene that implies a use the product is not made for | Read the image against the angle sentence and the product spec |
When the model has redrawn the product itself, reject the image and regenerate from the cut-out. Retouching a garbled label usually produces a third version of your packaging. Background faults, such as a stray object or a bad shadow, are fine to fix in editing. Log rejections by failure mode, and turn the most frequent one into a new line in the brief.
Step 6: size product ad images for Meta and Google placements
These are the common ratios for static image ads. Specs change, so check Meta's Ads Guide and Google Ads Help before each export.
- Meta feeds on Facebook and Instagram: 1:1 square and 4:5 vertical. The 4:5 version takes more of a phone screen.
- Meta Stories and Reels: 9:16 full screen. The interface covers the top and bottom, so keep the product and copy in the middle.
- Google Performance Max, Demand Gen and responsive display ads: 1.91:1 landscape and 1:1 square, plus 4:5 portrait where the campaign type accepts it.
Landscape goes wrong most often: a product that fills a square becomes a small object in a wide room. Brief it on purpose, with the product large and off-centre. Every new ratio goes back through step five. Images for Shopping listings follow their own, stricter requirements, so check those separately.
Steps 7 and 8: launch a structured test and read it by customer value
I learned test discipline on websites before ads. Omniconvert Explore customers have run 70,000+ experiments, with a 23.2% average conversion uplift, and the rule that makes any test readable carries straight over to creative: change one thing per cell.
- Name everything. Put angle, scene, ratio and version in every ad name, so reports group by angle.
- Hold the rest still. Same audience, budget, copy and landing page across angles. If the landing page differs, you are testing the landing page.
- Set the stopping rule first. Write down a minimum spend or conversion count per angle. Our guide to statistical significance and when to call a winner explains why early calls mislead.
Read the results in two passes. First, group every image under its angle. The angle is the learning, and the images are executions of it. If all the scenes for one angle beat all the scenes for another, you have found a promise that works. If results are mixed inside an angle, fix the scene, not the angle.
Second, look at who each angle brought in. A discount-led angle can win on return on ad spend and bring buyers who never reorder. A durability angle can cost more per first order and bring customers back. Compare angles on first-order margin and repeat purchases in your higher-value segments. The CLV-weighted growth model explains why that changes what you scale. When an angle wins as a static image, the natural next test is the same angle in motion, covered in our guide to creating video ad variations at scale.
Where Nexus fits in this workflow
Mapped onto the steps, Nexus unifies your store, ad and customer data and builds RFM segments, the raw material for step one. It monitors competitor ad libraries continuously and classifies competitor creative by angle, hook and offer. It generates launch-ready assets from customer data, ranked by CLV-weighted angle, which is the work of steps three and four. For step eight, it measures results in True Profit, not ROAS.
It composes static ads with the product imagery you already have. It does not shoot new photos or render models, and it leaves the bid and campaign lifecycle to the ad networks. Clean cut-outs still matter, and your review before approval is where you confirm the product looks right. For other options at the generation step, see our ranking of the best AI ad creative tools for Shopify.
FAQ: AI product ad images
Can AI product ad images replace a product photoshoot?
Not fully. AI can generate the setting, but the product should come from real photos, because customers buy what the image shows. You still need clean shots of every variant you advertise. What AI replaces is the cost of building a new set for each angle you want to test.
How many image variations should I test per angle?
Enough to separate the angle from the execution, and few enough that each image gets real spend. Two or three scenes per angle, across two or three angles, is a sensible start. More variations split the budget until no cell reaches a readable result.
Why do AI images get label text wrong?
Many image models treat lettering as visual texture rather than as spelled words, so small print often comes out close but wrong. Keep the real label from your product photo instead of asking the model to draw it, and add headlines and prices in a layout step, where you control the spelling.
Do I need to disclose that product ad images are AI-generated?
Check the current policies of each ad platform and the advertising rules in each market you sell in, because they differ and they change. One principle holds everywhere: the product in the image must match the product the customer receives. A generated background is styling. An altered product misleads, and it comes back as returns.
How does Nexus by Omniconvert help with product ad images?
Nexus generates static ad creative from your existing product imagery and customer data. It builds RFM segments, ranks angles by CLV and measures results in True Profit, not ROAS. It does not shoot product photos or render models, and you approve what goes live.
The bottom line
AI makes the scene cheap, and that moves the cost of a bad image from the studio to the customer's doorstep. So put your care where the risk now sits. Choose the angle from what your best customers already say. Give the model a clean, real product and a brief that fixes everything about it. Check every image against the product on your desk, and build each placement as its own scene. Then test angles, not pictures, and judge them by the customers they bring back, not the clicks they buy.